示例 3: GJK颗粒的堆积模拟
该示例用于GJK颗粒的堆积过程模拟
SudoDEM 中有五种颗粒它们的接触检测算法是用GJK算法实现的,即球体,多面体,圆锥体,圆柱体以及立方体[^5],
我们我们采用GJK颗粒来统一的归类如上颗粒。对应的,Python脚本中该颗粒可以用以下包来导入
_gjkparticle_utils (see Sec.
5.1.3{reference-type=“ref”
reference=“modgjkparticle”}), 这五种颗粒的构造函数如下所示:
-
GJKSphere(radius,margin,mat)
-
GJKPolyhedron(vertices,extent,margin,mat, rotate)
-
GJKCone(radius, height, margin, mat, rotate)
-
GJKCylinder(radius, height, margin, mat, rotate)
-
GJKCuboid(extent, margin,mat, rotate)
注: 每个颗粒都被放大了一定的倍数用于加速颗粒接触检测算法,该放大倍数要足够大用以保证颗粒颗粒在较小尺度下可以发生接触,
同时该放大倍数要足够小,以避免颗粒形状的过度失真。
与示例1类似, 我们将会模拟GJK颗粒在立方体盒子中的自由落体堆积过程。进行模拟前,我们需要先导入如下包:
1
2
3
4
5
6
|
from sudodem import plot, _gjkparticle_utils
from sudodem import *

from sudodem._gjkparticle_utils import *
import random as rand
import math
|
定义生成颗粒的参数信息:
1
2
3
4
5
6
7
8
9
|
cube_v0 = [[0,0,0],[1,0,0],[1,1,0],[0,1,0],[0,0,1],[1,0,1],[1,1,1],[0,1,1]]
cube_v = [[i*0.01 for i in j] for j in cube_v0]

isSphere=False

num_x = 5
num_y = 5
num_z = 20
R = 0.01
|
定义颗粒生成栅格:
 1
 2
 3
 4
 5
 6
 7
 8
 9
10
11
12
13
14
15
|
#R: 相邻节点的距离
#num_x: x轴节点数量
#num_y: y轴节点数量
#num_z: z轴节点数量
#返回所有节点的位置信息
def GridInitial(R,num_x=10,num_y=10,num_z=20):
   pos = list()
   for i in range(num_x):
      for j in range(num_y):
         for k in range(num_z):
            x = i*R*2.0
            y = j*R*2.0
            z = k*R*2.0
            pos.append([x,y,z])
   return pos
|
设置材料属性
1
2
3
4
5
6
7
8
|
p_mat = GJKParticleMat(label="mat1",Kn=1e4,Ks=7e3,frictionAngle=math.atan(0.5),density=2650,betan=0,betas=0) #define Material with default values
#mat = GJKParticleMat(label="mat1",Kn=1e6,Ks=1e5,frictionAngle=0.5,density=2650) #define Material with default values
wall_mat = GJKParticleMat(label="wallmat",Kn=1e4,Ks=7e3,frictionAngle=0.0,betan=0,betas=0) #define Material with default values
wallmat_b = GJKParticleMat(label="wallmat",Kn=1e4,Ks=7e3,frictionAngle=math.atan(1),betan=0,betas=0) #define Material with default values

O.materials.append(p_mat)
O.materials.append(wall_mat)
O.materials.append(wallmat_b)
|
生成立方体盒子
1
2
3
4
5
6
|
# create the box and add it to O.bodies
O.bodies.append(utils.wall(-R,axis=0,sense=1, material = wall_mat))#left wall along x axis
O.bodies.append(utils.wall(2.0*R*num_x-R,axis=0,sense=-1, material = wall_mat))#right wall along x axis
O.bodies.append(utils.wall(-R,axis=1,sense=1, material = wall_mat))#front wall along y axis
O.bodies.append(utils.wall(2.0*R*num_y-R,axis=1,sense=-1, material = wall_mat))#back wall along y axis
O.bodies.append(utils.wall(-R,axis=2,sense=1, material =wallmat_b))#bottom wall along z axis
|
生成模拟引擎并设置固定时步:
 1
 2
 3
 4
 5
 6
 7
 8
 9
10
11
12
13
|
newton=NewtonIntegrator(damping = 0.3,gravity=(0.,0.,-9.8),label="newton",isSuperquadrics=4)

O.engines=[
   ForceResetter(),
   InsertionSortCollider([Bo1_GJKParticle_Aabb(),Bo1_Wall_Aabb()],verletDist=0.2*0.01),
   InteractionLoop(
      [Ig2_Wall_GJKParticle_GJKParticleGeom(), Ig2_GJKParticle_GJKParticle_GJKParticleGeom()],
      [Ip2_GJKParticleMat_GJKParticleMat_GJKParticlePhys()], # collision "physics"
      [GJKParticleLaw()]   # contact law -- apply forces
   ),
   newton
]
O.dt=1e-5
|
多面体颗粒生成如下所示:
 1
 2
 3
 4
 5
 6
 7
 8
 9
10
11
12
|
#生成试样
def GenSample(r,pos):
   for p in pos:
        body = GJKPolyhedron([],[1.e-2,1.e-2,1.e-2],0.05*1e-2,p_mat,False)
        body.state.pos=p
        O.bodies.append(body)
        O.bodies[-1].shape.color=(rand.random(), rand.random(), rand.random())

# 生成栅格
pos = GridInitial(R,num_x=num_x,num_y=num_y,num_z=num_z) # get positions of all nodes
# 为每个节点生成颗粒
GenSample(R,pos) #
|
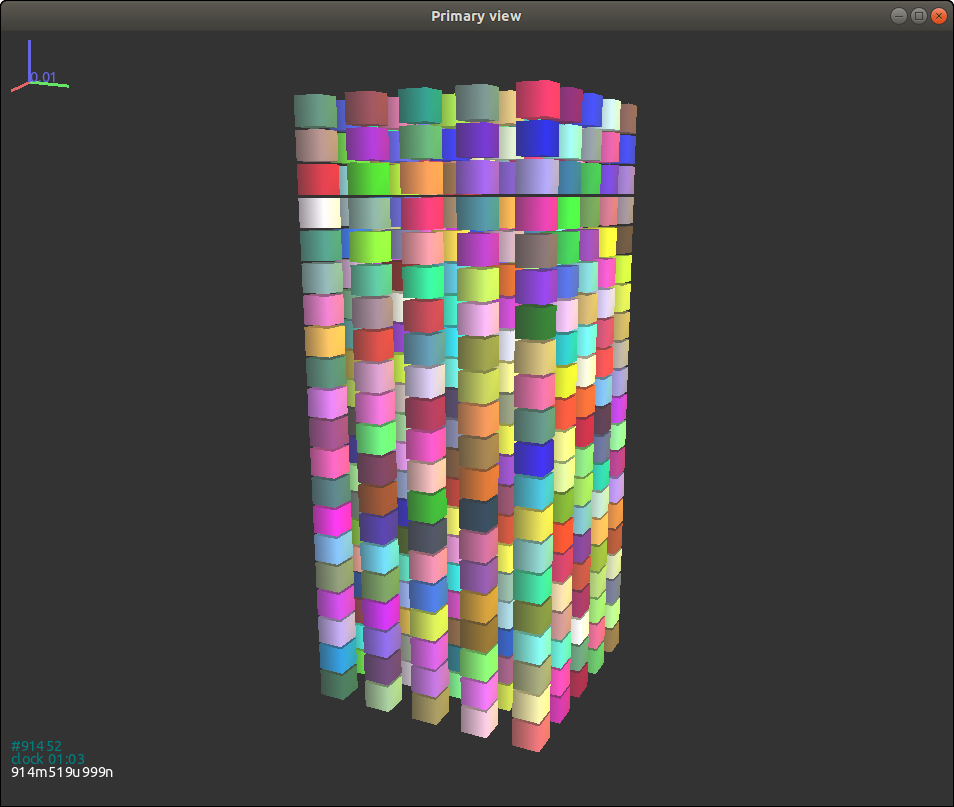
 {#figgjkpolyhedron width=“8cm”}
 {#figgjkcone width=“8cm”}
对于圆锥体来说函数 GenSample 需做如下改动:
1
2
3
4
5
6
7
|
#生成试样
def GenSample(r,pos):
   for p in pos:
        body = GJKCone(0.005,0.01,0.05*1e-2,p_mat, False)
        body.state.pos=p
        O.bodies.append(body)
        O.bodies[-1].shape.color=(rand.random(), rand.random(), rand.random())
|
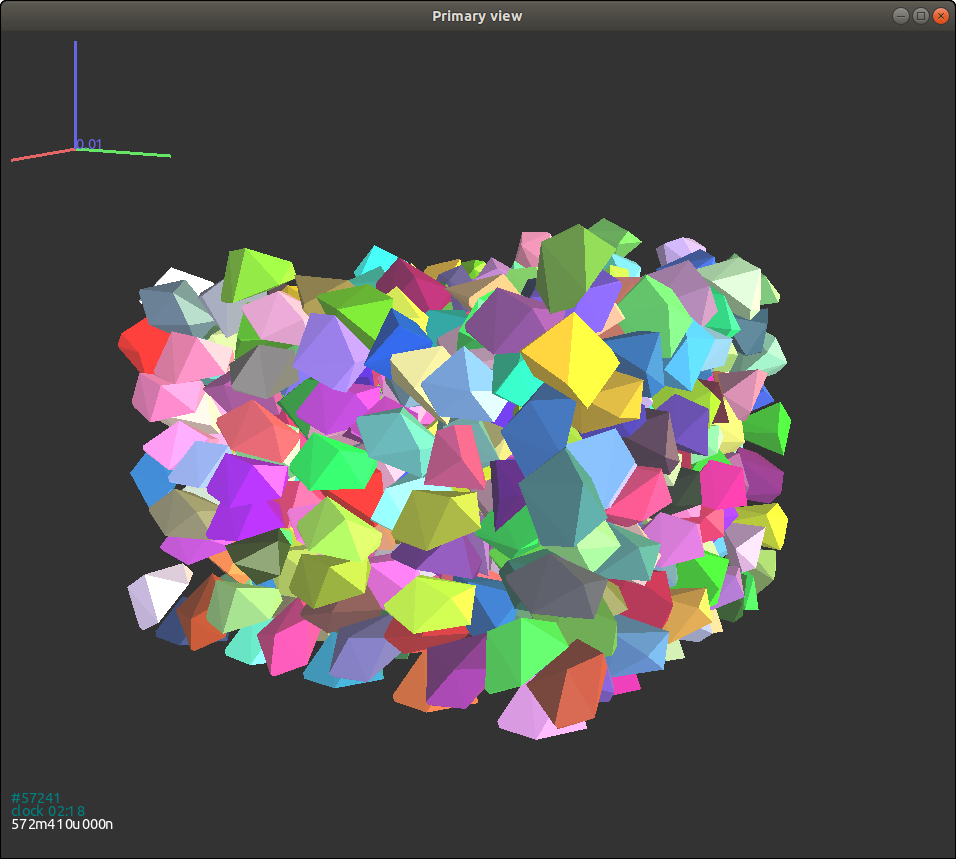
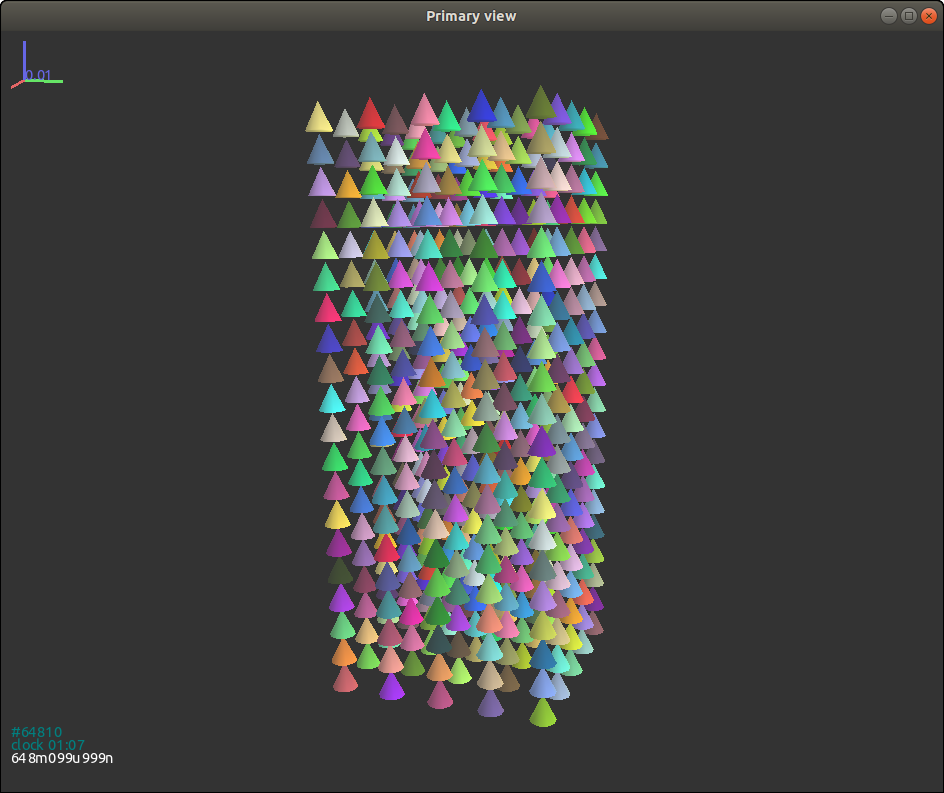
Fig. 3.12{reference-type=“ref” reference=“figgjkcone”}
给出了固定初始朝向的圆锥体试样 (通过将变量 rotate 设置为 False 来取消随机的初始朝向生成)。 可以看到所有颗粒的初始状态都是完全相同的。
用户可以尝试将变量 rotate 设置为 True 来测试下随机初始朝向的颗粒试样:
1
|
body = GJKCone(0.005,0.01,0.05*1e-2,p_mat,True)
|
 {#figgjkcone2 width=“8cm”}
如图所示,自由落体过程破坏了颗粒非常一致的初始朝向分布:
3.13{reference-type=“ref” reference=“figgjkcone2”}
 {#figgjkcylinder width=“8cm”}
圆柱的生成函数 GenSample 改动如下:
1
2
3
4
5
6
|
def GenSample(r,pos):
   for p in pos:
        body = GJKCylinder(0.005,0.01,0.05*1e-2,p_mat,False)
        body.state.pos=p
        O.bodies.append(body)
        O.bodies[-1].shape.color=(rand.random(), rand.random(), rand.random())
|
 {#figgjkcylinder2 width=“8cm”}
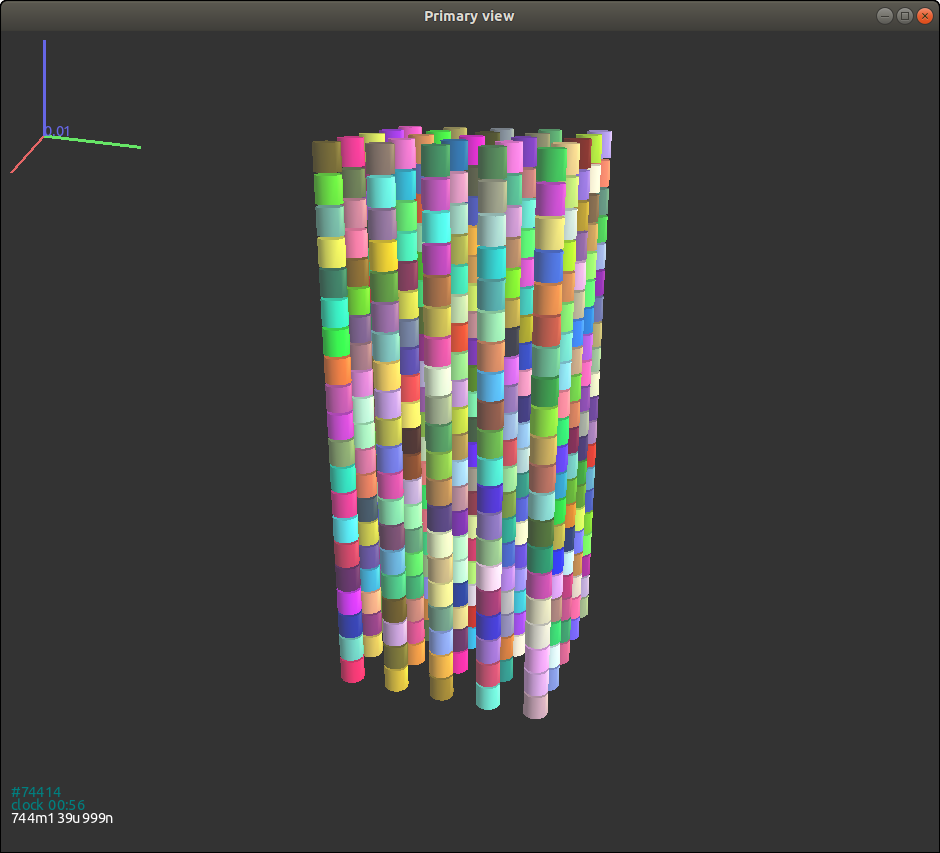
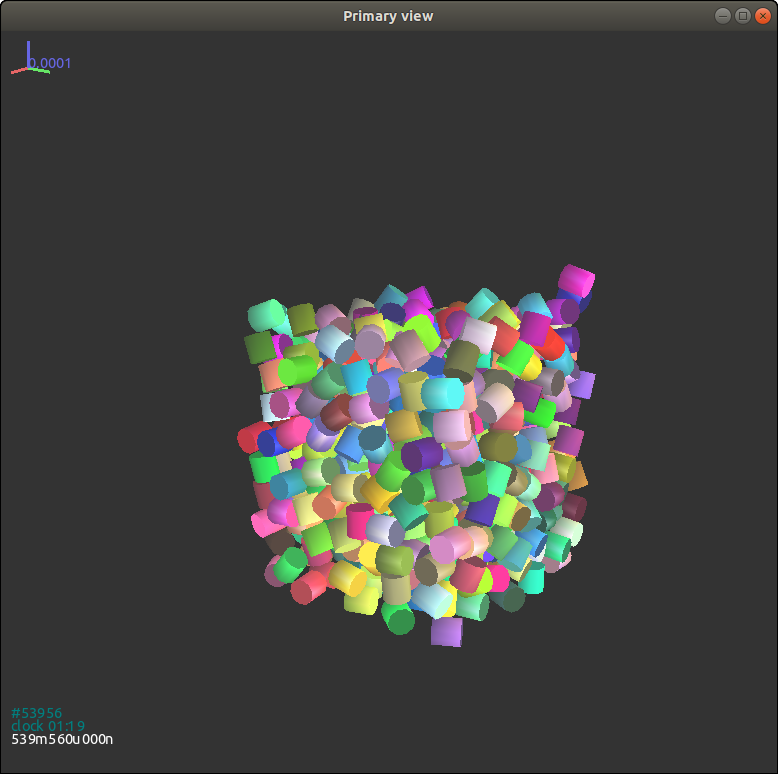
不出意料,对于初始朝向一致的圆柱颗粒,即使是在自由落体后,它们的朝向仍然不变 Fig. 3.14{reference-type=“ref”
reference=“figgjkcylinder”}。但是当初始朝向是随机生成时,自由落体结束后的圆柱体朝向变得不规律起来 3.15{reference-type=“ref”
reference=“figgjkcylinder2”}。
1
|
body = GJKCylinder(0.005,0.01,0.05*1e-2,p_mat,True)
|
 {#figgjkcuboid width=“8cm”}
 {#figgjkcuboid2 width=“8cm”}
立方体的函数如下:
1
2
3
4
5
6
7
|
#生成试样
def GenSample(r,pos):
   for p in pos:
        body = GJKCuboid([0.005,0.005,0.005],0.05*1e-2,p_mat,False)
        body.state.pos=p
        O.bodies.append(body)
        O.bodies[-1].shape.color=(rand.random(), rand.random(), rand.random())
|
立方体的初始一致或随机生成朝向的自由落体过程与圆柱体非常相似。在初始朝向一致时,如图所示Fig. 3.16{reference-type=“ref”
reference=“figgjkcuboid”} 自由落体结束后朝向并未发生显著变化。 但是随机初始朝向的试样,在自由落体过程前后的朝向分布有巨大的差异。
True as follows:
1
|
body = GJKCuboid([0.005,0.005,0.005],0.05*1e-2,p_mat,True)
|
另外,考虑到立方体颗粒间的间隙较小,所以它们的随机朝向在自由落体前后的分布差异较圆柱体不明显。